Mastering KiCad Component Attributes
Discover the 3 essential KiCad component attributes: Exclude from Bill of Material, Exclude from Board, and Do Not Populate. Learn when and how to use them to control your BOM and PCB design — with real-world examples and visual guides.
When designing a printed circuit board (PCB) in KiCad, one of the most critical yet often overlooked aspects is managing your Bill of Materials (BOM). Incorrectly including or excluding components can lead to costly errors in manufacturing, assembly, or procurement.
But what if you could control which components appear in your BOM — without altering the visual appearance of your design?
The answer lies in component attributes — powerful, hidden tools in KiCad that allow you to fine-tune how elements are treated during BOM generation.
In this guide, we’ll walk through the three essential attributes used to manage component visibility in KiCad:
🔹 Exclude from Bill of Material
🔹 Exclude from Board
🔹 Do Not Populate
And we’ll show when and why each one is useful — with real-world examples to help you avoid common mistakes.
📌 1. Exclude from Bill of Material
(The “I don’t need this in BOM” switch)
This attribute tells KiCad: ”This component should not appear in the final BOM.”
✅ What it does:
- Removes the component from the BOM
- Does NOT change the visual appearance on the PCB or schematic
- Leaves footprint and placement intact
📌 Default behavior:
In modern KiCad libraries (for such elements as mounting holes, fiducials, silkscreen marks), this attribute is enabled by default.
💡 When to use it:
You know for sure that a part doesn’t require a purchase order. For example:
A mounting hole doesn’t need to be bought — it just serves as a physical anchor for the board. No part number, no cost, no entry in BOM.
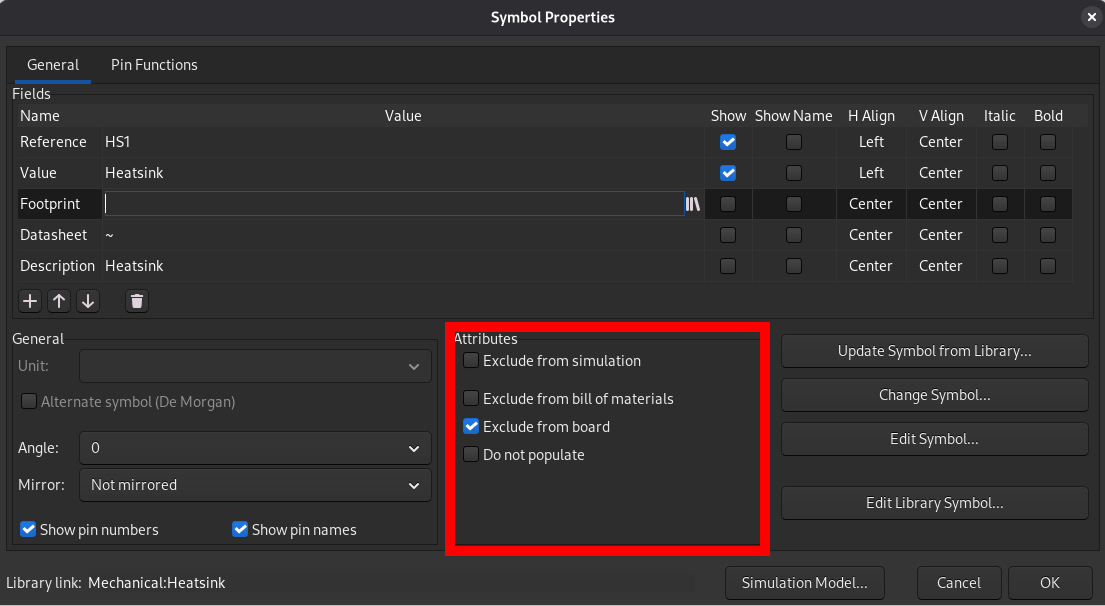
🔧 How to set it:
- Double-click any component → open the Properties panel
- Check “Exclude from bill of material”
- Save the change
🔍 Tip: This is safe and non-disruptive — ideal for standard non-functional elements.
📌 2. Exclude from Board
(The “Remove from PCB, keep in BOM” option)
This attribute is more nuanced:
The component will appear in your BOM, but will NOT be placed on the PCB.
✅ What it does:
- Included in BOM (so it shows up in procurement lists)
- Removed from the actual PCB layout
- Still appears in the schematic (if referenced)
📌 Use case:
You have a mounting hole that’s used to fasten the board to a chassis. You want to add a screw to your BOM — but no screw footprint exists. So you can:
- Add a mounting hole (with a footprint)
- Mark it as ”Exclude from Board”
- Add a screw component (e.g., “M3x10”) to the schematic
- The screw shows up in the BOM — even though it’s not on the PCB
💡 This is perfect for fasteners, brackets, or connectors that are not physically installed on the board but are still needed for assembly.
🔧 How to set it:
- In the Properties panel → enable “Exclude from board”
- The component will disappear from the PCB but stay in the BOM
📊 Pro Tip: Use this when you need to track consumables like screws, washers, or adhesives — even if they aren’t placed on the board.
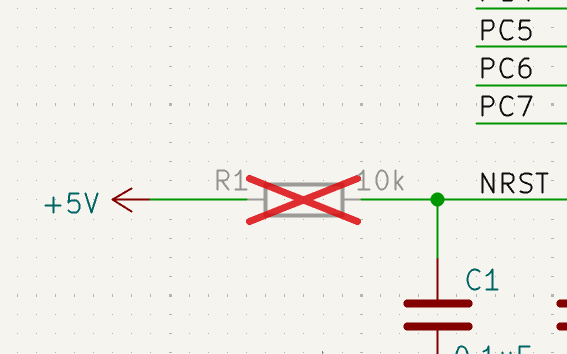
📌 3. Do Not Populate
(The “Mark with a red cross” flag)
✅ What it does:
- Excludes component from BOM just like “Exclude from Bill of Material”
- Adds a red cross symbol on the schematic
- Indicates that the part is not yet populated
📌 Use case:
Imagine you’re designing a schematic and have a resistor, but you’re unsure whether it will be used in the final design. You want to keep the footprint for future use — but don’t want it to appear in the BOM until you’re certain.
So you:
- Place the resistor in the schematic
- Set “Do Not Populate”
- It appears with a red cross → clearly shows it’s “pending”
- Later, if you decide to use it, you can simply remove the attribute and proceed with assembly
💡 This is especially useful for:
- Prototype designs
- Design iterations
- Factory assembly where components might be added later
🔧 How to set it:
- Open the Properties panel
- Check “Do Not Populate”
- The red cross appears on the schematic automatically
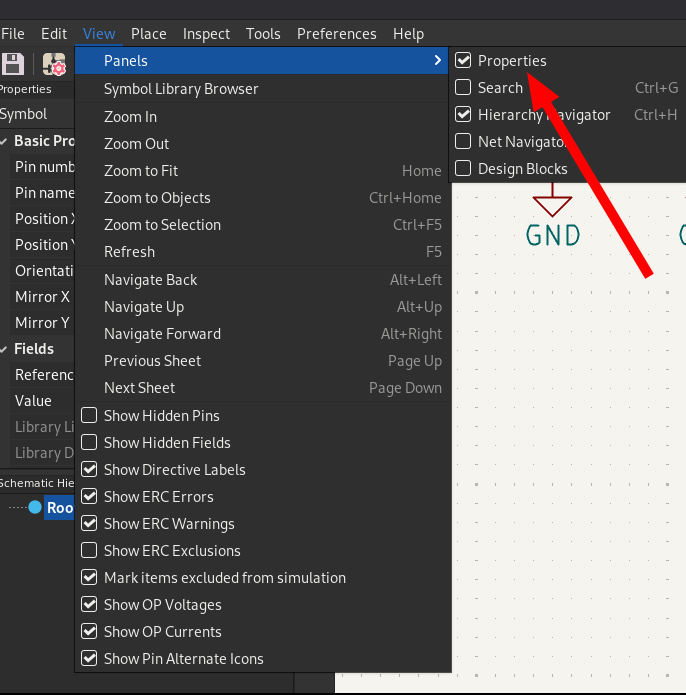
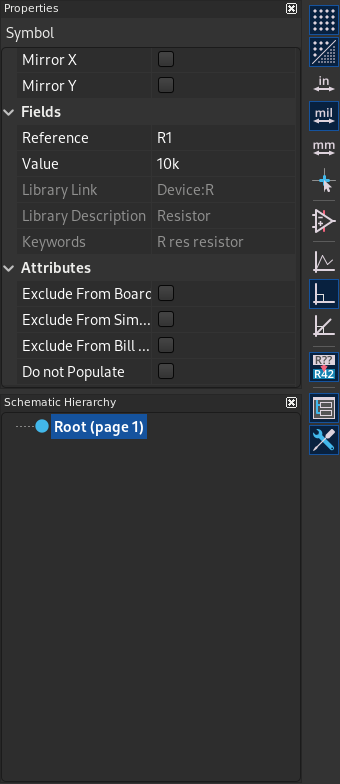
🔍 How to Access These Attributes in KiCad
- Double-click on any component (schematic or PCB)
- Open the Properties panel (in newer KiCad versions, it appears on the left side of the workspace)
- Look for the relevant attribute under ”Attributes” or ”General” tab
- Toggle the option as needed
📊 When to Use Which Attribute? Quick Reference Table
| Attribute | In BOM? | On PCB? | Schematic? | Best For |
|---|---|---|---|---|
| Exclude from Bill of Material | ❌ | ✅ | ✅ | Mounting holes, silkscreens |
| Exclude from Board | ✅ | ❌ | ✅ | Fasteners, brackets, screws |
| Do Not Populate | ❌ | ✅ | ✅ (with red cross) | Future components, prototypes |